 Love them or hate them, YouTube stars are now a major part of our popular culture. Even beyond the well-known channels, personalities, and “influencers” to be found on the platform, there are plenty of more casual creators putting out great content and maybe even making a little extra money for themselves in the process. Perhaps watching these videos has you thinking about becoming a vlogger/creator yourself and starting your own YouTube channel. As luck would have it, that’s exactly what I’m doing right now.
My vlogging adventure began a few weeks ago while working on an article about writing a book manuscript. With the thought of vlogging floating around in my mind for some time now, I suddenly realized I now had the perfect opportunity to try my hand at video and create a clip to insert in the post. My assumption was that I could just use the built-in camera on my iMac to record the video — especially since my USB mic would help boost the audio quality and make the whole production better. To my dismay, once I got to editing the clip, I realized something harsh: my video looked like crap.
That’s when I determined that, if I really wanted to give vlogging and creating videos a shot, I was going to need some new equipment. From that moment for about a week straight, I watched dozens of YouTube reviews, read tons of articles, and even set foot in a Best Buy to try to determine my best path forward in terms of gear. Now I’m ready to take all that research and pass what I learned onto you, including what specific items I ended up purchasing for myself.
In my eyes, there are three technical components that go into a YouTube video: visuals, audio, and editing. But first, we need to talk money.
Setting Your Camera Budget
With this being a personal finance site, you had to know this was going to be the first part, right? I joke, but it actually is very important to consider your budget and how much you’re willing to spend to get started with vlogging. Additionally, figuring out your hard limit ahead of time will help prevent you from succumbing to what I call “shiny object syndrome” — in other words, “I need to have the newest and best!”
It’s true that, in buying gear and software to begin vlogging as a hobby or possibly a career, you’re really making an investment (note: you may also be able to write some of the expenses off of your taxes if you consider vlogging part of your business). That said, you should be realistic about your return on that investment and refrain from going too big out of the gate. Instead, many vloggers start off with more basic equipment and work their way up as they get more seasoned and, quite honestly, can afford to upgrade. Besides, the majority of viewers are more interested in the actual content of your videos than how sharp and well lit they are.
Another reason to avoid going for top of the line your first time out is that the learning curve for more expensive cameras like DSLRs can be quite steep. Sure the pros may use these types of cameras, but that’s because they know how to. Keep in mind that just shelling out the cash doesn’t immediately give you the knowledge of how to operate them. As a result, you may end up spending a boatload of cash on a fancy camera and still end up with subpar production value — what a waste! So, before you go hitting up Amazon and plunking down thousands, you’ll likely want to look into some more starter-friendly options.
Lastly, while you may be all gung-ho about vlogging now, you may discover that the work of shooting and editing clips is just too much for you. If this should happen to you, you’ll be very glad you didn’t spend a whole paycheck on gear you no longer have a use for.
Not dissuaded just yet? Great! With your budget in mind, let’s now jump into some of the equipment you’ll need to pick up.
What Vlogging Camera Should I Get?
As the ‘v’ at the beginning of the word implies, vlogging is a visual medium. Thus, it may seem obvious that a getting a camera is job one when getting started. But, as you’ll quickly learn, there are thousands of different options on the market that you can use to capture video. Let’s take a look at a few of them and the pros and cons of each.
What’s a good vlogging camera?
Before we get into specific options, here are a few things that make for a good vlogging camera:
- Portability — I don’t know about you, but I don’t want to be lugging around a giant camera on my adventures if I don’t have to.
- Low-light capabilities — If you’re only vlogging outside during the day or have other sources of light, this may not be a big deal. However, for certain indoor locations or exterior night shots, you’ll want a camera that will still do a serviceable job.
- Wide-angle lens — Again, this may not as big a deal if you plan on doing videos where the camera is on a tripod and you don’t move, but when holding a camera “selfie style,” you’ll probably want a wide lens (24mm is best but 28mm is good as well). This will prevent you from cropping your head out of the frame… or overstretching your arm while trying to get in the shot.
- A flip–up screen — This feature is a vlogger favorite as it allows them to get a better idea of what’s in frame when they’re pointing the camera at themselves.
- Good battery life — Not only can lugging extra batteries around be annoying but buying them can also be pretty expensive. Thus, you’ll want to find a camera that will let you shoot a decent amount of footage on one charge
Now for the bad news: finding a camera with all of these features is not only difficult but, should you find one, it will be hella expensive. That’s why you’ll need to figure out which of these — or any other features — are most important to you and which you can sacrifice. For example, forgoing the flip-up screen will usually allow you to afford a camera with a larger aperture (meaning it should do better in low light). Just like you figured out your budget to stick to ahead of time, listing out your priorities before shopping is also extremely helpful.
Camera option #1: Your smartphone
It may be surprising to some to find out how good the cameras are on many modern smartphones, but considering the hundreds of dollars we spend on such devices, it does kind of make sense. So if you don’t want to spend money on a new camera just yet, you may want to simply try using your phone to shoot your videos. Heck, if the iPhone 5S was good enough to shoot an award-nominated film on, surely it’s good enough for YouTube.
To be fair, the film I’m referencing Tangerine used a few tricks to make their footage look better. For one, the filmmakers purchased special lenses that could clip onto the phone, giving them greater shooting options and an overall cinematic look. Of course, you can do something similar by searching for additional lenses, which are now becoming more and more common.
One major downside to using your phone is the battery. Since many of us need our smartphones for tasks other than shooting video, you may not want to risk depleting your battery by vlogging with it. Of course, there are external chargers and cases that may come in handy to compensate, so there is still hope.
Camera option #2: Webcams
If you plan on recording videos from in front of your computer, you may want to just consider upgrading your webcam. Sure many laptops and desktops now have cameras built in, but (as I learned from my first video) they don’t always look great. Meanwhile, for around $100, you can find an easy to use camera that will attach to your computer and plug into the USB port.
The negative here is obvious: you can really only shoot when you have a computer with you. Then again, with the power and size of laptops these days, that might not be as limiting as it once was. Still, if you plan on doing other types of content that will require you to film more freely, you’ll want to look for another option.
Camera option #3: “Point and shoot” style
Point and shoot cameras are compact and often beginner-minded, making them a great option for vlogging newbies. While some styles may start at around $150, other more advanced models can run up to $1,000 or more. Luckily, there are plenty of price points in between, allowing you to find a camera that checks off at least a few of the points we discussed earlier.
Personally, I was attracted to a point and shoot-style camera because I wanted to be able to fit the camera into my pocket. Moreover, I’m surely not one of those people who can walk around town with a giant camera pointed at themselves — I want something a little more inconspicuous. Plus, as mentioned, these compact cameras are usually a bit more accessible to beginners, which is what I am.
Of course, compact can also sometimes come at a premium. You may find that a camera in a larger body (although still technically a point a shoot model) that won’t exactly fit into your pocket might offer you more in terms of specs than a smaller, prettier one. Once again, this is a consideration you’ll need to make as you decide are “must haves” for your camera.
Camera option #4: DSLRs
Digital single-lens reflex cameras — far more commonly known as DSLRs — are high-end cameras typically used manually. For that reason, they’re mostly intended for enthusiasts who know their way around the various settings. This also includes removing and changing out lenses whereas point and shoot models have fixed lenses.
The one big thing you need to know about DSLRs is that they are by no means cheap. In fact, when you look at prices for these types of cameras online, the amount you’re seeing is probably only for the camera body, meaning you’ll still need lenses (which can cost a pretty penny on their own). Needless to say, these are a major investment — not only in terms of money but also time as you’ll need to learn a lot about photography and videography to get the most out of these cameras.
So why go DSLR in the first place? Simply put, they look amazing when used properly. As a result, many top YouTubers utilize these types of cameras to shoot their videos. Perhaps you can one day too… but it may not be the right thing to do off the bat.

Buying a used camera
Is there anything more heartbreaking than finding the perfect camera only to learn it’s just out of your price range? Well, there may be one last option for making it work: buying used. In addition to sites like Craigslist or Ebay where those looking for pre-owned items tend to go, I found Amazon to be a trusty ally on my quest toward owning my dream camera.
If you go to the Amazon page for a camera model you like, the main number displayed is the full retail price the item fetches new. However, if you scroll down a bit, you may find a link that reads “Used & new from ($).” This is where you can save a ton of money.
While some of these sellers are third parties, some are actually sold directly through Amazon through what’s known as Amazon Warehouse Deals. Not only are these items backed by Amazon like any other purchase from them but are also eligible for Prime shipping. Each item (including the third party ones) also lists a condition rating such as “very good” or “acceptable.” Pro tip: be sure to check for any additional notes on the listings as well as some may offer details on the item’s condition or what accessories are/are not included.
One thing to keep in mind when viewing these items is that, once they sell, they’re gone. As a result, you may find different prices and options from day to day (for better or worse). So, if you see the right camera at the right price, you may want to pull the trigger sooner rather than later.
Additional vlogging equipment
No matter what camera you end up choosing, there will likely be a few other pieces of gear you’ll want to grab as well. For starters, a tri-pod (mini or full-sized) is a must. One option I’ve seen many vloggers use is the GorillaPod, which can be adjusted to fit in a number of positions.
This also seems as good a place as any to talk about WiFi-equipped cameras. While I was skeptical of this feature before fully understanding it, it moved up my priority list once I figured it out. Basically, certain cameras have the ability to become WiFi hotspots that you can then connect to in order to transfer pictures from your camera to your phone. Better yet, some cameras even let you control your camera via your smartphone! Since the camera I choose sadly doesn’t have a flip-up screen (spoiler alert), this feature could certainly come in handy if I was concerned about my framing.
Finally, you may need to invest in some sort of lighting. This is obviously more important if you’re shooting inside, but might able be helpful in on-the-go circumstances. From LED selfie lights that attach to your phone to softbox lights to turn your living room into a studio, adding a little light can often improve your video’s look immensely.
What I chose
After all of my searching, YouTube video watching, and a good amount of frustration I decided to pick up the — drumroll please… — Sony RX-100 II. I was attracted to the camera because of its low aperture (f/1.8), pocket-friendly size, and because it looked impressive from some of the test footage I watched online. The other good thing about the RX-100 is that Sony is currently selling the fifth iteration of it while reducing the price on previous models.
Because the Mark II had since been replaced three times (the Mark V retails for $1,000), it now lists for $600. Sadly, this was still out of my price range — but enter Amazon Warehouse Deals like a damn superhero to save the day. By buying used and in “good” condition, I was able to nab it for $400. Two days later, it showed up at my apartment and, as you can tell from my unboxing video, I had a hard time finding anything wrong with it:
Vlogging Tips for Audio
Video quality is undoubtedly an important aspect of YouTube content, to be sure, but good audio quality is equally important. Granted, while it may be harder for less discerning ears to notice when sound isn’t top-notch, they’ll certainly notice when it’s flat out bad or hard to hear. That’s why, as part of your “getting started with vlogging” budget, you may want to set aside a few dollars for a proper microphone.
Types of mics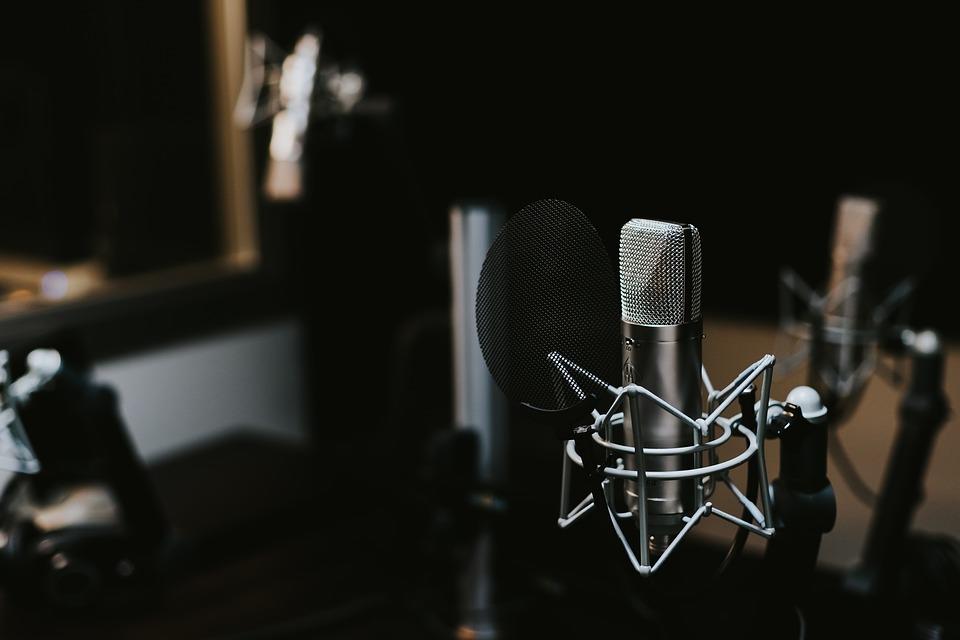
It may surprise you to learn that there are all kinds of microphone types that serve a number of different functions. On your search for sound, you’re likely to come across terms like “omnidirectional” or “condenser” that might only serve to confuse you. To prevent getting too technical or overwhelming, we’ll just look at four types of microphones commonly used for vlogging.
Smartphone mics
As we learned, your smartphone’s camera can do pretty good job when it comes to video quality. Incidentally, the same can be true of voice recording. However, it can also be improved upon by adding an external mic.
Today you can find a number of microphones that plug into your phone’s headphone jack (or into the Lightning port via a dongle, iPhone 7 users). From there, you can record video on your phone with the enhanced sound. Alternatively, you can record just audio using Apple’s Voice Notes or a third party app and sync it to your camera footage later.
USB mics
Like with webcams, USB microphones are accessories meant to improve your computer’s ability to record sound. For vloggers planning on shooting videos on their computers, this is a must. Thankfully, it’s also not terribly expensive to get a decent USB mic.
One extremely popular option in this field is the Blue Snowball, which goes for about $70. Other such mics can reach $100 to $200 in price while some can go as low as $20. Keep in mind that, at a certain point, the price of these microphones is outweighing the difference in quality. For that reason, $70 to $100 seems like a fair range when you’re getting started.
Shotgun mics
Don’t be alarmed — that’s just what these directional mics are called. Incidentally, if you’ve ever watched a behind the scenes clip from the set of a film, you’ve probably seen a shotgun mic attached to a boom pole hovering over the actors’ heads. That’s about all you need to know to understand why these types of mics are popular for vloggers and other YouTubers.
Shotgun mics come in many different sizes and, more importantly, prices. That said, one go-to brand for vloggers is Rode, which makes mics made to fit a number of different devices (including one meant to clip onto smartphones). Therefore, you can probably find a good option in your price range and build it into your vlogging set up. The only downside is that they’re not always that small and the size of said set up can really start to grow.
Lavalier mics
Also known as clip-on mics or lapel mics, these are the small microphones you might see worn by talk show hosts or news reporters. These can also be plugged into certain cameras or used with computers and phones with standard headphone jacks. For that reason, this is actually the option I went with for my inconspicuous aspirations.
Be advised that professional lavalier mics can get quite pricey. That said, there are a number of reasonably — if not surprisingly low — priced options out there. Personally, I picked up the Purple Panda lav mic for less than $20 on Amazon (you can check out the clip in the “What I choose” section to hear how it performed).
What’s not so great about this type of microphone is that it’s only meant to pick up one person. Thus, if you plan on doing interviews or having other people in your videos, you’ll need to mic them up as well. This might even necessitate a second recording device (although there are workarounds in terms of adapters to plug two mics into one port) — just something to keep in mind as your thinking out future content.
A word on syncing sound
As I hinted at a bit, not all cameras will have a port to plug in an external microphone. Unfortunately, in these cases, you may need to record sound separately — using a digital recorder or a smartphone — and sync it to the video in post production. A simple trick for facilitating this is to clap loudly once both the video and sound are rolling. That way, you can find that spike in sound when you’re editing and make it way easier to match up the tracks (fun fact: that’s what those slates or “clapper boards” they use on film sets are for).
While this isn’t exactly ideal, it’s usually worth the extra effort if it means a large improvement over your video device’s on-board sound. But, if you don’t want the headache, consider 1) getting a camera with an audio port 2) using your smartphone with an external microphone or 3) sticking to your computer with upgraded webcam and USB mic. In all three of these cases, your video and audio will be merged into one file, making editing a little bit easier.
 Video Editing Software
You’ve shot your video and captured great sound, so now comes the hard part: editing. Put mildly, editing video can be a real pain in the butt — and not just because of the hours you spend sitting in front of your computer working a single project. Yet, nearly all vlogs need some type of editing love, so here we go.
Editing software for desktop
When it comes to editing video, using a desktop computer is probably your best bet. While we’ll get to a few smartphone options in a minute, the most popular editing programs reside on desktop. In addition to industry standards like Avid and (to a lesser extent) Final Cut, there are a number of video editing options depending on your skill level and budget.
If you own a Macintosh computer, you actually already have one editing option in iMovie. This program comes pre-installed on Mac OS devices and can be a good place to start when learning the basics. That said, iMovie has never been my favorite for a number of reasons — not the least of which is that it consistently crashed on me!
After losing my battle to iMovie, I turned to Adobe Premiere Pro instead (available for both Mac and PC). In addition to being way more stable on my computer, I find it easier to use than the newer versions of iMovie — although I am likely in the minority among beginning editors on that opinion. Additionally, since I had already used Photoshop and InDesign for publishing my own book, upgrading to the entire Adobe suite was only a few dollars more per month. Of course, if you’re outside of the Adobe ecosystem or prefer a one-time payment option, Final Cut Pro (Mac only) retails for $300 on the Mac App Store.
While these may be the most well-known editing programs out there, they’re far from the only ones. In fact, you can find a number of options that will meet your needs for a fraction of the price. I asked a friend of mine what he uses to edit his weekly vidcast and he recommended PowerDirector. Although I can’t speak to the software itself, the $60 price tag sure is attractive.
Vlog editing tips
Did I mention that video editing was a pain in the butt? That’s doubly true when you’re first starting out. I must warn you that opening up your program for the first time and exploring the options can be quite overwhelming, but I have a few tips to navigate you through it.
First, I highly recommend taking advantage of free trials. Most developers understand that plunking down hundreds of dollars of software without giving it a shot is a no-go for many, so several of them offer some sort of trial period (for Premiere Pro it was seven days). Give these a shot and make sure the program is going to be a good fit before buying. Also, try to learn as much as you can while it’s still free.
So what’s the best resource for learning to edit videos for YouTube? Well, YouTube. There’s a breadth of tutorials both official and user-created that will help walk you through some of the features of your editing software. That said, these guides can sometimes be as overwhelming as the programs themselves.
My best advice for using these tutorials is to first choose a specific skill you want to learn or action you want to perform. This could be as simple as how to import clips to your project or more advanced topics like color correction. Then, search for a video that shows you how to complete that task and practice it until you’re comfortable. I’ve found that this one-step-at-a-time approach allows me to learn the nuts and bolts of the software and find the tools I need to complete my project without getting bogged down in all the extras.
Editing on a smartphone
If your video project doesn’t require a lot of fancy editing or you just don’t have the time or money to invest in desktop software, there are now several ways to edit video right on your phone. Incidentally, iMovie, Adobe Premiere, and PowerDirector all offer companion apps that are either free or only cost a few dollars. These apps will allow you merge clips, create titles, and export your video directly to YouTube. For longer videos, the process of editing the entire project on your phone might prove annoying after a while — especially if you’re including multiple clips — but for shorter, on-the-fly videos, this might be a pretty good option to start with.
In conclusion
I don’t know about you but I’m pretty hyped to get my vlogging adventure started. Armed with my new camera, mic, and editing software, I’m ready to start producing videos and building my channel. Hopefully this guide to everything I’ve learned so far will aid you as you try to navigate the world of vlogging along with me. Just remember that, while quality video, audio, and editing are important, content is king, so do good work. See you on YouTube!